


Surgical Tools: Types, Uses and Safe Handling Guide
Surgical Tools: A Practical Guide to Types, Uses, Care and Safety
Surgical tools are the hand-held instruments an operating team uses to cut, hold, clamp, expose and close tissue. You might be a nursing or surgical technology student, someone who buys supplies for a clinic, or simply curious about what sits on a sterile tray. The same questions come up each time. What are the main types? How do they differ? How are they kept safe between patients?
This guide answers those questions in plain terms, using guidance from the CDC, the WHO and the FDA. It is educational, not clinical training. Your hospital’s policies and the manufacturer’s instructions always come first.
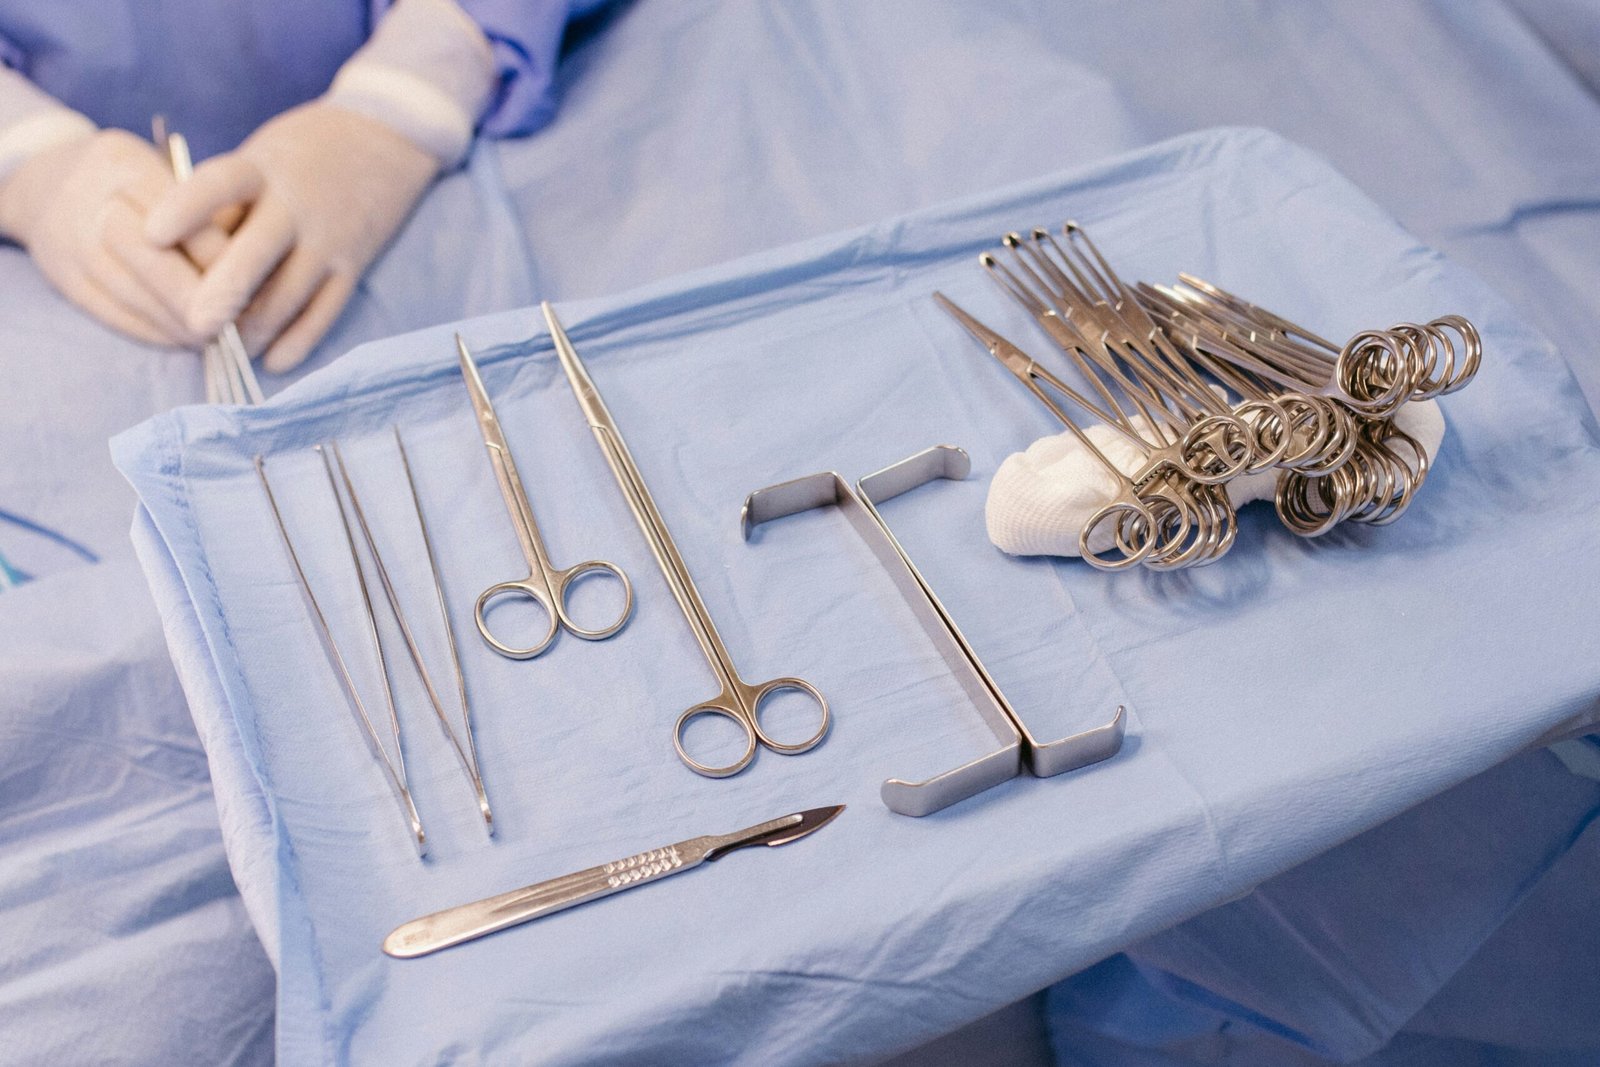
Quick answer: Surgical tools are usually sorted into four groups: cutting and dissecting, clamping and occluding, grasping and holding, and retracting and exposing. Trays also carry suturing, stapling, suction and viewing tools.
The Four Main Groups of Surgical Instruments
Most training material sorts instruments by what they do rather than by body part, because that makes a large tray easier to learn.
| Group | Purpose | Common examples |
|---|---|---|
| Cutting and dissecting | Incise, cut or separate tissue | Scalpel handles and blades, Mayo and Metzenbaum scissors |
| Clamping and occluding | Compress vessels to control bleeding | Kelly, Crile and mosquito hemostats |
| Grasping and holding | Hold tissue or needles | Adson and DeBakey forceps, Allis and Babcock clamps, Mayo-Hegar needle holder |
| Retracting and exposing | Hold tissue aside for visibility | Deaver, Army-Navy, Richardson, Gelpi, Balfour |
Cutting and dissecting
A scalpel is a handle plus a detachable blade. Blades 10, 11, 12 and 15 fit the No. 3 handle, while larger blades (20 to 25) fit the No. 4 handle. Mayo scissors are heavier and suit dense tissue such as fascia. The lighter Metzenbaum scissors suit delicate tissue and are often used to spread and dissect.
Clamping and occluding
Hemostats compress vessels to control bleeding. Their locking ratchets keep them closed without a hand holding them. Kelly clamps are larger, while mosquito clamps are small and fine for delicate work. Hemostats are meant for occluding vessels, not for dividing tissue.
Grasping and holding
Tissue forceps come in toothed and smooth (atraumatic) forms. Toothed forceps such as Adson grip firmly but cause more tissue trauma, so they suit tougher tissue like skin and fascia. Smooth forceps such as DeBakey are gentler on delicate tissue. Allis and Babcock clamps hold tissue such as bowel or fascia. Needle holders, such as the Mayo-Hegar, hold the suture needle and are a separate category from tissue forceps.
Retracting and exposing
Hand-held retractors are held by an assistant. The Deaver retractor is a large, question-mark-shaped retractor commonly used to hold back the abdominal wall during abdominal or thoracic procedures. Self-retaining retractors, such as the Gelpi and Balfour, stay open on their own and free the assistant’s hands.
Other tools on the tray
Beyond these four groups, trays include suturing and stapling devices, suction tips, electrosurgical tools and viewing instruments such as laparoscopes.
What Are Surgical Instruments Made Of?
- Stainless steel is the standard for most reusable instruments because it tolerates repeated heat sterilization and resists corrosion.
- Tungsten carbide inserts appear on the jaws of high-quality needle holders and scissors to stay sharp and grip longer.
- Titanium is lighter and non-magnetic, and is used for some microsurgical and specialty instruments.
- Plastics and polymers are used mainly in single-use tools.
Why Surgical Instruments Must Be Sterile, Not Just Disinfected
The Spaulding classification is the risk-based system behind the CDC’s Guideline for Disinfection and Sterilization in Healthcare Facilities. It sorts items into critical, semi-critical and non-critical groups based on how they contact the patient. Items that enter normally sterile tissue or the vascular system are “critical.” Surgical instruments are the standard example, and critical items must be sterilized. Regulators and accreditors apply the same logic. The Joint Commission says organizations must confirm that critical instruments are intended for reuse and have validated reprocessing instructions for cleaning and sterilization.
How Instruments Are Reprocessed Between Patients
The WHO manual on decontamination and reprocessing of medical devices covers the full chain, from cleaning and packaging to sterilization and transport. The usual cycle looks like this:
- Point-of-use care. Remove gross soil and keep instruments from drying out. WHO guidance advises against soaking devices in saline or hypochlorite solution, because it can damage them.
- Transport. Move used instruments in closed, labeled containers.
- Cleaning. Clean manually, in an ultrasonic cleaner or in a washer-disinfector. Cleaning is the necessary first step of any sterilization or disinfection process, because soil left behind compromises the result.
- Inspection. Check hinges, jaws, tips, ratchets and edges under good light. Remove anything bent, cracked, stiff, rusty or dull.
- Assembly and packaging. Assemble sets according to the tray list and wrap or pouch them so they stay sterile until used.
- Sterilization. Follow the manufacturer’s validated cycle. Steam is the most common method, and heat-sensitive items may need low-temperature methods.
- Storage and traceability. Store in a clean, dry area and record sterilization batches so sets can be traced.
The FDA’s reprocessing guidance expects manufacturers to provide validated reprocessing instructions for reusable devices. For higher-risk designs, such as laparoscopic instruments, the FDA requires validation data for cleaning and sterilization in 510(k) submissions. This is why the manufacturer’s instructions for use (IFU) must be followed exactly. For a structured learning option, the free OpenWHO course on decontamination and sterilization covers cleaning, packaging, steam sterilization validation and the dangers of reprocessing single-use devices.
Reusable vs. Single-Use Instruments
For most facilities the real choice is between reusable and single-use tools, and many use both.
| Reusable | Single-use | |
|---|---|---|
| Per-use cost | Lower over time | Higher, recurring |
| Reprocessing | Cleaning, inspection and sterilization every time | None |
| Wear | Edges dull, hinges loosen | Fresh each time |
| Waste | Less | More |
| Staff burden | Needs a trained sterile processing team | Mainly storage and stock |
| Best for | Core instruments used daily | Low-volume or hard-to-clean items, limited sterilization capacity |
This table is general analysis, not data from a single study. Costs vary widely by country and hospital.
Single-use devices should not be casually reprocessed in-house. The WHO manual has a dedicated section on reuse of single-use devices, and the OpenWHO course above explains the risks.
Habits That Keep a Tray Safe
Before use
- Learn names and uses together. Know what each tool does, not only what it looks like.
- Inspect before use. Pull anything damaged.
- Follow the maker’s instructions. Cycle times and cleaning agents differ by device.
During use
- Match the tool to the job. Keep fine scissors for tissue rather than suture or tape, and use heavy clamps only on tissue that can tolerate them.
- Handle sharps carefully. Pass them one at a time, and don’t let loose instruments pile up on the sterile field.
- Count everything. The WHO Surgical Safety Checklist asks the nurse to confirm that instrument, sponge and needle counts are complete before the patient leaves the operating room. Counts are also normally done before a cavity is closed, are recorded, and any discrepancy must be resolved under your facility’s protocol.
After use
- Do not let blood dry on instruments.
- Separate sharps and delicate instruments from heavy ones before transport and washing.
- Report damaged instruments rather than returning them to circulation.
Why Training Matters as Much as Equipment
Checklists only work when people use them. A clinical audit at Rawalpindi Medical University found that lack of awareness and training was the commonest barrier to following the surgical safety checklist, and compliance improved after an educational intervention. A baseline study of tertiary hospitals in Karachi found that sponges, needles and instruments went uncounted in roughly one in five observed cases before a checklist was introduced. The lesson is simple: good instruments need trained people and a consistent routine.
Common Mistakes to Avoid
- Using an instrument for the wrong job, such as cutting wire with scissors.
- Letting blood and tissue dry on instruments before cleaning.
- Soaking instruments in saline or harsh chemicals for long periods.
- Skipping inspection because the tray looks clean.
- Overloading trays so steam cannot reach all surfaces.
- Rushing counts when the team is busy.
Buying Instruments: A Short Checklist
Before you order, ask the supplier for:
- The written cleaning and sterilization instructions (IFU), validated as the FDA guidance expects
- Compatible sterilization methods
- Material and finish
- Warranty and repair or sharpening services
- Evidence that the maker follows ISO 13485, the international quality management standard for medical device manufacturers
- A full list of what each set contains
Also confirm that your sterile processing department can actually reprocess what you buy.
Latest Developments
Robotic instruments are a growing part of surgery, and reuse is spreading with them. In March 2026, Restore Robotics received FDA 510(k) clearance to remanufacture two more da Vinci Xi instruments, the permanent cautery hook and spatula. At the other end of the spectrum, Microbot Medical’s Liberty became the first FDA-cleared single-use robotic system for peripheral endovascular procedures in September 2025. Reusable and disposable approaches are both advancing. Device approvals change quickly, so check the FDA or your local regulator for current status.
Frequently Asked Questions
Can any steel instrument be used on any patient?
No. Use only instruments that have been cleaned, inspected and sterilized to your facility’s standard.
Why does cleaning come before sterilization?
Soil can shield microbes from the sterilant, so a dirty instrument cannot be made safe by sterilizing it.
Does a tray need to be re-counted?
Counts are normally done at the start and end of procedures where items could be left in the patient, and again before closing a cavity. They are documented.
Do staff always follow checklists?
Not always. The Rawalpindi audit above shows that training gaps are a leading reason, which is why regular training matters.
Is “surgical tools” the same as “surgical instruments”?
Yes, in everyday use. “Instruments” is the more common clinical term.
How do surgical tools work?
Each tool works through its shape and mechanics. A scalpel focuses force on a sharp edge, a hemostat locks its jaws to hold a vessel closed, and a retractor pulls tissue aside so the surgeon can see.
What should beginners learn first?
Start with the four groups and the common examples in each. Learn names and uses together, treat sharps with care, and ask a qualified instructor or sterile processing lead before handling real trays.
Key Takeaways
- Surgical tools are grouped by job: cutting, clamping, grasping and retracting, plus special-use devices.
- Instruments that enter sterile tissue must be sterilized, and cleaning always comes first.
- Reusable and single-use tools each have costs and benefits, and many facilities use both.
- Counting instruments, sponges and needles is a core safety step.
- Training and routine, more than equipment alone, decide whether a tray stays safe.
What to Do Next
If you are a student, practice sorting instruments into the four groups and learn one or two examples in each. If you manage supplies, review your cleaning instructions and count procedures before you review product catalogs.
Costs, device approvals and local rules vary by country and change over time. Confirm them with your regulator or the manufacturer.